

Welcome to Math Craft World! This community is dedicated to the exploration of mathematically inspired art and architecture through projects, community submissions, and inspirational posts related to the topic at hand. Every week, there will be approximately four posts according to the following schedule:
- Monday: Highlights from member submissions to the community corkboard.
- Tuesday: Introduction to the new project of the week.
- Thursday: Extensions, inspiration and more mathematical details for the current project of the week.
- Friday: Inspirational posts about artists and artwork in the field, including historical projects and works.
My goal is to host a public forum in which people can learn, participate and contribute. With that said, please post anything of relevance in the comments section of posts, the community corkboard, or start a thread in the forum. I'm hoping the community will learn even more from each other than from my posts.
Since this is the first post, and future Mondays will be dedicated to presenting community submissions, I'm going to go off schedule and share a simple DIY project for exploring the basics of geometric art.
Paper Polyhedra
Polyhedra are the three-dimensional extension of two-dimensional polygons. They are composed entirely of flat faces and straight edges. Since they are made entirely of flat faces with straight edges, you can often unfold them to a two-dimensional shape, as you would with a cardboard box. This unfolding of the polyhedron is called a net. One of the easiest ways to make a three-dimensional shape is by making the net out of paper and folding it.
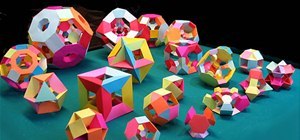
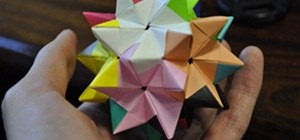
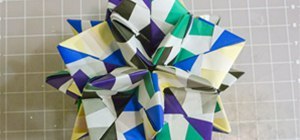
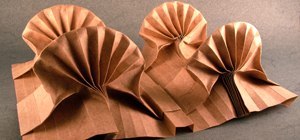
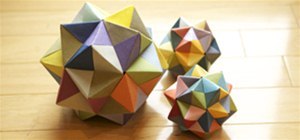
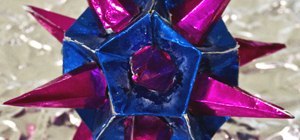
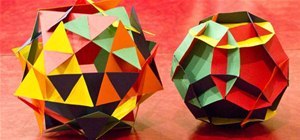
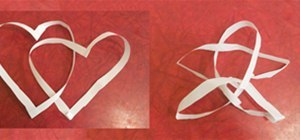
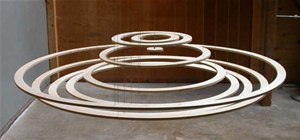
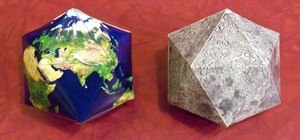
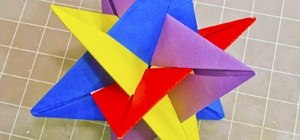
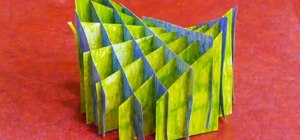
To show what amazing forms can be made from paper—using techniques similar to folding nets—I present some images of work by Father Magnus Wenninger.
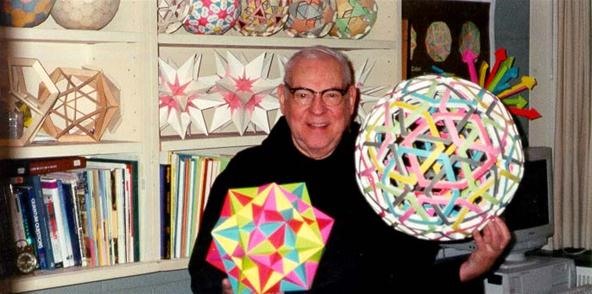
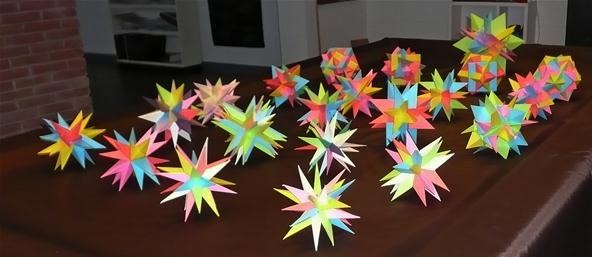
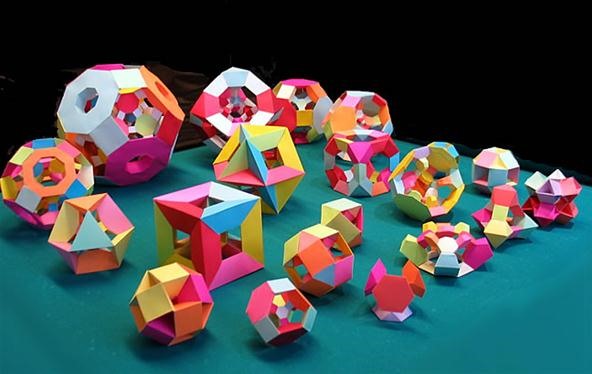
These are truly amazing geometric shapes. The objects in the last group are actually three-dimensional projections, or shadows of objects that can only exist in four dimensions! Some day, perhaps, we'll take a look at these polychorons in detail.
For now, let's look at nets for folding up simpler paper geometric objects. Gijs Korthals Altes has a great site for finding these nets. All you have to do is download the object, and then use your printer to print it out on regular paper or card stock. Next, cut out the shape of the object and fold as directed, and then glue or tape the object closed.
I suggest starting out with the Platonic Solids, which are the simplest of polyhedrons. They are composed entirely of regular polygons of the same size and shape, and are convex so that all angles bend towards the shape's center. The templates (nets) can be found here. Once you've exhausted the platonic solids, I suggest the Archimedean Solids, which can have more than one type of polygon. Those nets can be found here.
Finally, to make really cool Christmas ornaments, you should try some convex polyhedra like the Kepler-Poinsot polyhedra (download here). Please note, these are significantly more difficult and time consuming. Some involve hundreds of folds. The great icosahedron, while beautiful, took me close to 3 hours to cut and fold out of 1 piece of paper.
Let's go through the process of making one of these in a bit more detail. We'll start with the dodecahedron.
Materials
- Something to cut with (scissors, or Exacto knife).
- Cutting mat or board, if using an Exacto knife.
- Paper or card stock. I use the thickest my printer can handle, so I can make stronger objects, but this does make it more difficult to fold. You can buy 110 lb card stock at any office supply store. Usually mass retailers such as Walmart or Target carry thinner cardstock, which might be preferable for some of you.
- A scoring tool like a blank pen or the back of a table knife. You only really need this if you use card stock. I actually just lightly use the blade of an Exacto knife, but this takes precision, so be careful if you use this technique.
- Tacky craft glue, super glue gel or tape.
Step 1 Download, Print and Cut
Go to the download site and find the polyhedron you wish to build. To follow along with me, go to the section on platonic solids and download the template for the dodecahedron. I recommend the .pdf files, and I usually print the color page rather than coloring my own. Print out the net. Cut it out using scissors or knife.

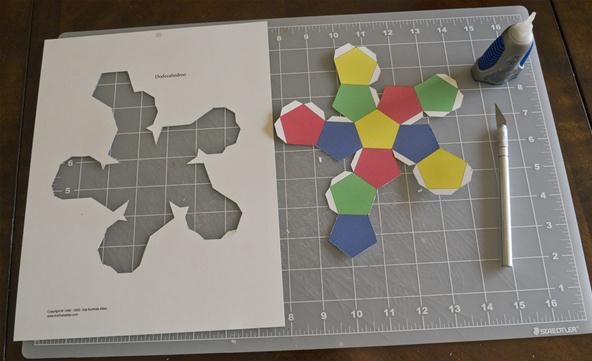
Make sure you cut the space between the tabs and the other polygon it starts off touching. Only leave the tab connected to the main polygon.
Step 2 Score
If you used card stock, apply pressure with your scoring tool across the edges and tabs that are to be folded. This makes the paper weaker in these spots, allowing the folds to be near perfect. If you used paper, the paper will fold fairly easy without this step. It can help, but it can also destroy the paper if you're not careful.
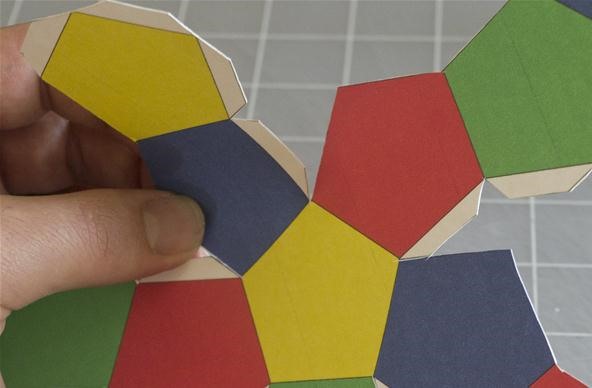
Step 3 Fold and Adhere
Fold and glue, or tape, the object together. I usually partially fold all of the edges and tabs so that I can see how the object is going to be formed.
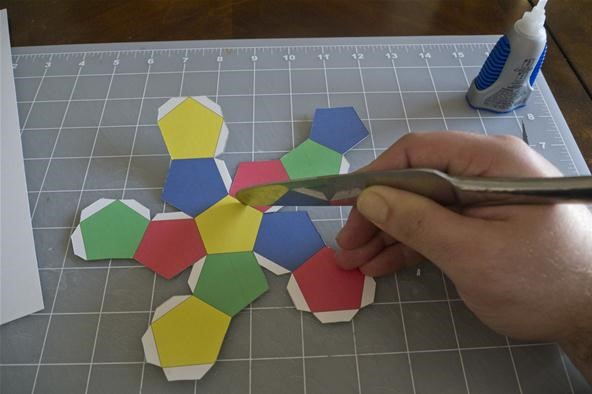
Put glue on the tab you wish to glue.
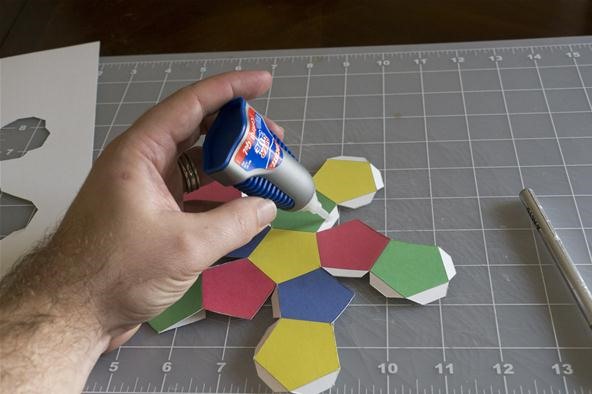
Press the tab together to the polygon it is supposed to attach to. For superglue, you only need to hold for a couple of seconds. For other glues, you might need to hold for close to a minute.
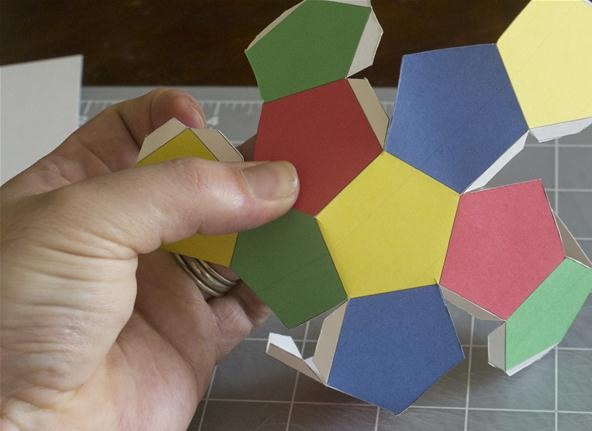
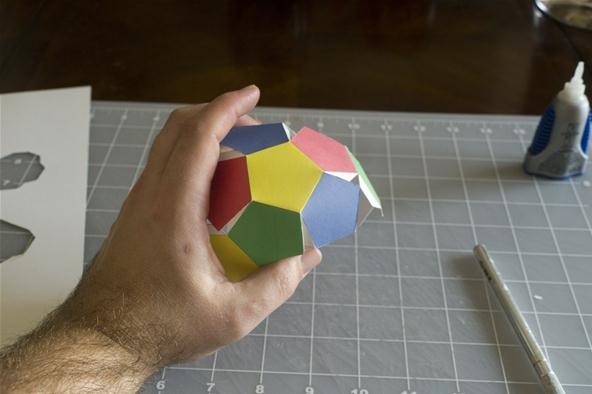
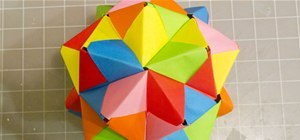
Repeat the placing of the glue on the tabs and pressing the pieces together until you're done. The final object should look like this:
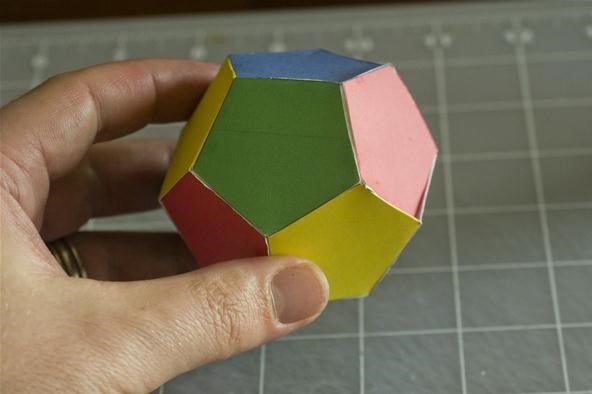
Step 4 You're Done!
Now go play with your growing polyhedral collection. Come up with ways to use them in other projects. You could use them as Christmas ornaments perhaps. Have fun and post the results to the corkboard!
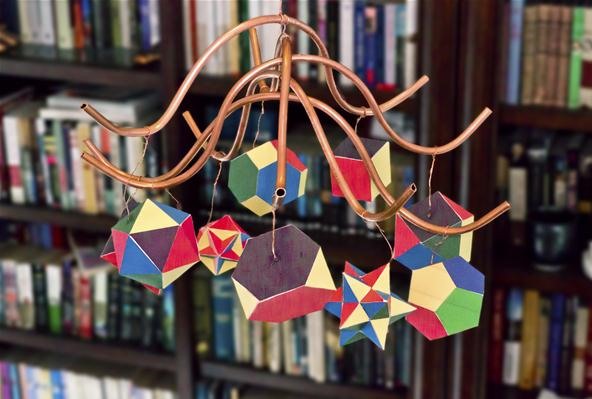
Here's mine: This weekend I decided to use some polyhedra to make a mobile for my newborn son. Here's a quick picture of what I made using paper polyhedra, some 1/4 inch copper tubing, and some copper speaker wire.
Lastly, here's the my most helpful tip: Don't get too frustrated. Some of you will be able to do this easily right away. Others might take quite a long time to produce something that looks like an elementary school child made it. Your hands may be covered in glue. This is normal. Like everything else, this might take some practice. It did for me. Have fun. And know that it is addicting. You might end up with a house, apartment, or dorm room completely full of these.
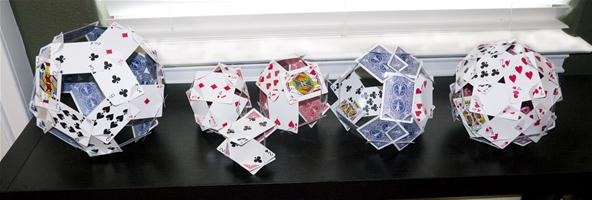
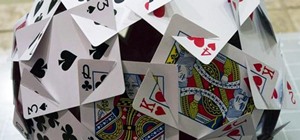
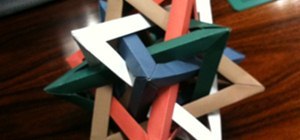
On Tuesday, we'll learn how to make polyhedra out of ordinary playing cards like this:
Just updated your iPhone? You'll find new emoji, enhanced security, podcast transcripts, Apple Cash virtual numbers, and other useful features. There are even new additions hidden within Safari. Find out what's new and changed on your iPhone with the iOS 17.4 update.

31 Comments
What a cool project. Looking forward to seeing more neat stuff from you, Cory.
Thanks! I hope you'll decide to build and share as well. We'd love to see it!
Love the mobile. You've inspired me—I'm considering pinching pennies on christmas shopping this year and painstakingly crafting these as Christmas ornament/gifts. Or maybe the playing cards instead. They're both beautiful.
Thanks. I'll probably post up a few other ideas that can be used as christmas ornaments/gifts. I stopped buying gifts for people 2 years ago and I'm not planning on going back! I gave one of the playing card constructions to a poker player once. I still keep hearing back from them about how cool it is.
I forgot to mention that photo paper can also be used which is thicker than regular paper - though not as thick as card stock - and is very shiny. It can be a little bit more difficult to glue however.
This is an amazing (and easy) paper net. Thanks! I might make some Christmas decorations as gifts, too. But I have a question, something I don't quite get: What do you mean when you say, "The objects in the last group are actually three-dimensional projections, or shadows of objects that can only exist in four dimensions!"
Ah. That's a difficult question to answer. In 1 dimension you only need 2 points to constrain space...the end points. In 2 dimensions this wouldn't work because you'd be able to go around those points utilizing the second dimension. So you end up needing lines to constrain space. If you utilize straight lines you find that you have to have at least three lines in order box everything in (1 more than your 2 dimensions). This is your simplist polygon. In three dimensions lines don't work to keep you boxed in because you could just go around them utilizing the 3d dimension. You need 2 dimensional surfaces to box everything in. If you use flat shapes with all straight edges and you constrain space, you just made a polyhedron. The simplist one of these has 4 triangular faces (1 more than the number of dimensions) and is called a tetrahedron. Note: even those these objects exist in 3 dimensions you can represent them in 2 d space by projecting them or looking at their shadows or cross sections. Extending this to 4 dimensions you would need space constrained by 3 dimensional objects (you can go around a plane in 4 dimensions). If these 3d objects were polyhedra you would find that you would need at least 5 (4 dimensions +1) of these to constrain 4 dimensional space. This would form the simplist polychoron which is the extension of polyhedra to 4 dimensions. The objects in the 3rd picture are 3d polyhedra which are 3d projections of 4d polychoron. In reality we are really seeing a 2d projection of a 3d projection of a 4d object. Here's a quick youtube video of the tesseract (4d equivalent of a cube) rotating in a "simple" 4 dimensional way: https://www.youtube.com/watch?v=5xN4DxdiFrs I actually made a video similar to this when I was an undergraduate math major and there wasn't anything that I could find on this subject. I've lost it unfortunately!
This could help too: https://www.youtube.com/watch?v=hEPnoYsT_So&feature=related
Ah, thanks for the explanation. Those videos helped me visualize it, but I was still a little confused with the shadow part. But then I started checking out some more sites and even Wikipedia, which has a nice little image that I think helped me picture what you mean by shadows, where it's showing how to create a tesseract from a single point. Am I getting the right idea here? The "shadow" would be the second cube in #4? Anyways... before I was just interested in those paper polychorons you pictured, but now I'm in awe.
Congrats on the world!
@justin I don't seem to be able to reply to your comment. Perhaps it became too many layers deep. I could be mistaken but I think what they are showing is how you keep on extending the object into new dimensions that form right angles to all of the previous dimensions.
When we look at a 3d object on a screen we can't actually see anything except for a projection or cross section of the object. One of the easiest ways to project an object is to imagine that it is illuminated by a point source of light and then we can have the 3d object be seen on a 2d plane via its shadow. You could imagine this same thing occuring for a 4 dimensional object but projecting it onto a 3d volume. Here's a video showing a tesseract (4d hypercube) rotating as in the video I linked to before. Note the 3d object is the 3d shadow of the hypercube. You are only seeing a 2d projection of that on your 2d screen. Below this object they are showing a 2d shadow of the rotation. So the shadow on the bottom is the 2d shadow of the 3d shadow of a 4d object.
Here: https://www.youtube.com/watch?v=FsxnO6CGbx4
Oh and how do you hyperlink in comments. I don't see how to do that...and inserting html code didn't seem to work for me.
And that cube you're talking about could be thought of as a cross section of the object since it is one of the enclosing volumes, just like a face of a cube is a cross section (one right at the end though) of the object. Hmm...I just realized something. If you're truly interested in this idea, and would like to read an interesting political and mathematical novel with some serious gender bias you should check out flatland: A romance of many dimensions. It's old enough that copyright has expired so you should be able to download it for free.
I think you can't reply because it's all the way over to the right. I don't like that...
Cory, thanks for clearing that up for me. That other video really helped me understand it all now. And thanks for the Flatland recommendation... I found some downloadable copies. Will read soon!
I got inspired by the picture of MathCraft, with the pennies so I did it myself- I'll post some pics to the corkboard soon.
awesome!
Awesome. You'll have to show me how you did it! Because chances are you figured out something better than me. Those were a pain to design and make. I think I could probably make the cube in 15 minutes or so now...but the others...take forever. If you're interested in these check out this on my old blog: http://oceananinchdeep.blogspot.com/2011/07/platonic-and-archimedean-solids-from.html Hopefully I'll figure out a quick and dirty way to make these and I can make a post here on how to make them. Maybe you can help!
Well, so far I've only made a cube and pyramid. I really don't think there is an easier way- just to use a soldering jig with 2 alligator clips.
i oniy made a cube
That's a good start! My guess is that's the first one I made too.
I made one with a Minecraft theme: http://www.flickr.com/photos/davidlindh/6241604613/sizes/l/in/photostream/
awesome!
That's really cool. So it's two intersecting cubes. What did you use to map the mine craft textures onto it? Did you do any calculations to figure out the angles? I'd love to have you post it up on the corkboard.
I used Compound Of Two Cubes as a template and copy pasted the textures on to it. Posted the image on thecorkboard together with a link to a printable version.
Thanks for sharing. It looks great.
how do you make the objects in the picture at the top of the page next to your picture?
Ah. I know of one program you can buy that supposedly allows you to make nets for those shadows or projections of 4 dimensional figures. Stella 4D. http://www.software3d.com/Purchase.php It actually only costs 33 dollars now...It was 99. Hmmm. I actually might buy it now.
Great project! Can't wait to do it!
NICE ART
is this is a sphe
oh its nice i can make a craft by following your instruction.
Share Your Thoughts